Ixtabay
Member
Hi Everyone,
It's been awhile since I posted, but a rainy day found me and I figured it was a good time to share some ServUO knowledge.
AWS is a great place to host your ServUO Shard. Not only are the network and hardware performance fantastic, but you can actually run ServUO on their free tier (free for 1 year!, no strings attached) if you run it on Linux. For this tutorial, I will explain how to run the latest ServUO on Debian 10 using mono. The guide does not go into detail about shard customization, fail2ban, or other extra performance and security measures. It is designed for the first time AWS user with little knowledge of Linux.
Note: This guide assumes that you are running Windows on a 64-bit PC for your home computer. If you are using an older 32-bit PC, then download 32-bit versions each. If you are using OSX or Linux as a workstation, then this guide is not for you.
You will need to install some software on your workstation, if you haven't already:
PuTTY and puttygen.exe - https://www.chiark.greenend.org.uk/~sgtatham/putty/latest.html
WinSCP - WinSCP :: Official Site :: Download
ClassicUO - ClassicUO

Install PuTTY by running the installer you just downloaded

Save puttygen.exe to some place convenient. It’s also ok just to leave it in your downloads directory.
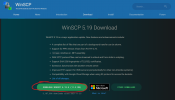
Now, download and install WinSCP
WinSCP :: Official Site :: Download
You will also want to make note of your PC’s public IP address. Save this for later.
https://www.whatsmyip.org/
Now, it’s time to get the server up and running. Visit Amazon Web Services (AWS) and setup a new account if you don’t already have one.
https://console.aws.amazon.com/console/home
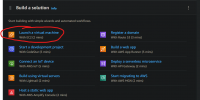
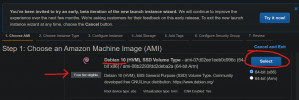
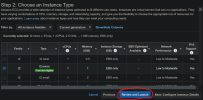
In the “Build a solution” table, click “Launch a virtual machine,” select Debian 10 (free tier eligible), click “Launch and Review” and then “Launch.”
When you get to this step, edit storage. You are allowed up to 30GB in the free tier, so you may as well take all you can for free.
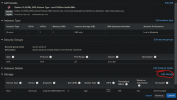
*** Set storage size to 30, otherwise you will not have enough drive space ***
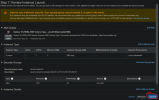
This next step is very important. Administrative access to your server requires a secure key file that only you will possess. MAKE SURE YOU DOWNLOAD THE KEY! This will be your only opportunity to do-so. I keep my keys stored in a safe place, but also email them to myself as a way to keep another copy.

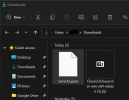
Double-check that you’ve downloaded it.
Continued on Part 2
Part 2
We will get back to the key in a minute, but first you will need to find out what your new server’s IP is.
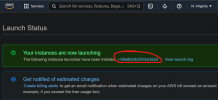
Click your instance ID

and then check the public IP address
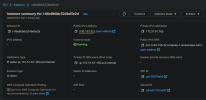
In order for you to connect to your server for administration, you will need to prepare your key for PuTTY. To do this, run puttygen.exe and click “Load”
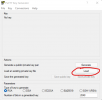
The key you downloaded (in our example, it is ServUO.pem). In order for puttygen to see the file, you need to choose “All Files (*.*)”

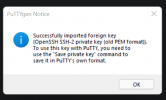
You should receive a notice like this (click OK)
Now, save your private key (Password protecting your keys is an extra measure you can take in case your keys get into the wrong hands. We will not cover password protecting keys in this guide.)
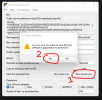
Name and save the key somewhere safe where you can find it easily in the next step.

Continued on part 3
Part 3
Now, run PuTTY. Enter your server’s IP address from the AWS console and give it a name.
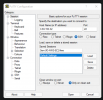
Now, find and click the category Connection/SSH/Auth
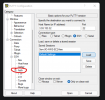
Browse to your key
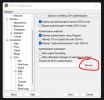
and select your key
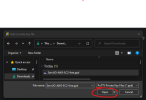
Now, go back to the Category Session
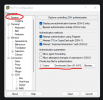
…and save your configuration
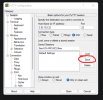
You should now see your AWS server in the list of saved sessions. Click Open
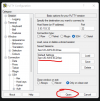
Continued on part 4
Part 4
If you did everything right so far, you will see a security alert from PuTTY.
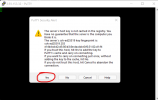
Click “Yes” and then enter “admin” at the “login as:” prompt. No need for password, because you are using a key! (safe and easy!)
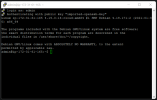
Your server is still fresh and needs some packages installed that will be needed to compile and run ServUO. You will need to use elevated access in order to install. Before we do that, we need to change the source list for packages, because the default source list doesn’t have everything we need.
Edit your source list:
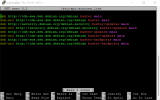
Now, press CTRL+K until all of the lines are gone and then paste in these lines (to paste into PuTTY, just right click)
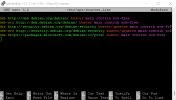
Press CTRL+X to exit and press Y (and enter) to save (don’t change the file name!)
Now, let’s do some updates
Enter command:
And then enter command:
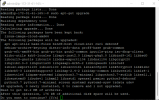
Press “Y” and enter to install available updates. This may take a few minutes. You will see lots of text scrolling as the updates are installed.
Install mono, some prerequisites, and helpful tools (htop and mlocate). First, enter command:
Answer “Y” enter as in the previous step.
This may also take a few minutes to install.
Now, you need to install dotnet-sdk-5.0. To get this, download from Microsoft and install:
Download:
install:
delete install file:
install apt-transport-https:
Update source (don’t forget to run this before trying to install dotnet, or will not work):
install DotNet 5.0:
The free AWS EC2 server only has 1GB of RAM, so you will receive a "memory exhausted" error if you try to compile and also risk running out of memory when your server is running. The fix for this is simple, create a swap file using available drive space.
A 4GB swap should do the trick (this will take a minute to complete):
2. Update permissions for the new swap file:
3. Set up swap area:
5. Confirm that it is working:
6. Ensure that it is enabled each time the server restarts by updating the /etc/fstab file.
Open the file in the editor:
Add the following at the end of the file (last line), then save and exit:
Now, download the master branch of ServUO source code:
Unzip it:
Change to the new ServUO-master directyory:
Now compile the server:
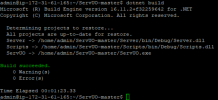
After a minute or so, it will be ready! Now, all you need are some UO files and to update a few configuration files.
Continued in Part 5
Part 5
Open WinSCP and import your configuration from PuTTY

Click OK
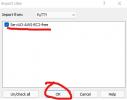
Now, connect
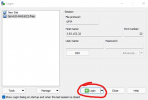
…and login as admin (no password needed, remember you are using a key)
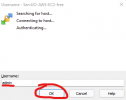
You will now see a graphical representation of your server.
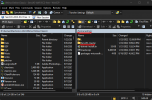
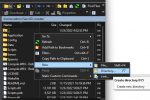
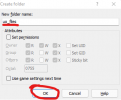
Enter the ServUO-master directory by double-clicking on it, and then create a new directory by pressing F7 and name it “uo_files”
Now, copy the .MUL files from your UO client installation to uo_files directory on your server.
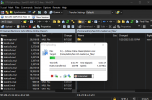
Once the MUL files have been copied over, you will need to update some of the configuration files. You can do this from WinSCP as well. Change directories to /home/admin/ServUO-master/Config
First, edit DataPath.cfg and add this line to the bottom:
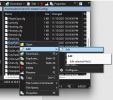

…then save and close the file
Check documentation and forums on the ServUO website for more information on how to further customize your shard.
Now, from PuTTY, launch ServUO.exe for the first time:
Continued on Part 6
Part 6

The first time you run, it will prompt you to setup your owner account. Use a name and password easy for you to remember, but others to figure out (and write it down or email to yourself). This tutorial does not get into further customization. Please refer to the forums, discord, and other great sources of ServUO information for more content on customization.
Your server will start, but you now will need to update your AWS firewall in order to allow outside clients to connect. Go back to the AWS website and click on “Security Groups”

Then Create Security Group (upper right of screen)

You will need to allow access to TCP port 2593 from Anywhere, but SSH TCP port 22 only from your own IP (My IP) If you do not have a fixed IP, or want to add other IPs, you can do so now or later if you IP changes. You should not allow access to port 22 from anywhere.
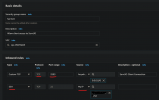
Now, go back to your dashboard and choose Change security groups for your server (aka instance).
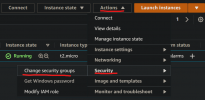

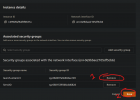
Add the new group and delete the old one. The old security group allows access to the SSH port 22 from anywhere and is a security risk. Don’t skip this step!
Now, it’s time to connect using your game client. For this step, we will use the amazing ClassicUO client!
Get it here: ClassicUO
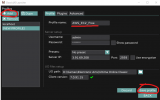
Continued on Part 7
Part 7


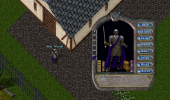
Enter the command [createworld to populate and decorate your new shard
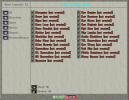
This concludes this tutorial. I hope you enjoyed setting up your shard on AWS. I've been an AWS users for many years have hosted (and still do) many web, PBX,and application servers. I've found the performance and stability to be outstanding and would recommend them to anyone.
There is still more to do on your new shard in addition to customizing it. I have some other tutorials on how to setup auto-restarts, using the screen application, and some other helpful Linux tips.
I did not have great success when trying to run ServUO on a free tier Windows server, but plan to try again sometime. If I have success with that, I'll be sure to drop a tutorial here for that as well.
Enjoy,
Ixtabay
It's been awhile since I posted, but a rainy day found me and I figured it was a good time to share some ServUO knowledge.
AWS is a great place to host your ServUO Shard. Not only are the network and hardware performance fantastic, but you can actually run ServUO on their free tier (free for 1 year!, no strings attached) if you run it on Linux. For this tutorial, I will explain how to run the latest ServUO on Debian 10 using mono. The guide does not go into detail about shard customization, fail2ban, or other extra performance and security measures. It is designed for the first time AWS user with little knowledge of Linux.
Note: This guide assumes that you are running Windows on a 64-bit PC for your home computer. If you are using an older 32-bit PC, then download 32-bit versions each. If you are using OSX or Linux as a workstation, then this guide is not for you.
You will need to install some software on your workstation, if you haven't already:
PuTTY and puttygen.exe - https://www.chiark.greenend.org.uk/~sgtatham/putty/latest.html
WinSCP - WinSCP :: Official Site :: Download
ClassicUO - ClassicUO

Install PuTTY by running the installer you just downloaded

Save puttygen.exe to some place convenient. It’s also ok just to leave it in your downloads directory.
Now, download and install WinSCP
WinSCP :: Official Site :: Download

You will also want to make note of your PC’s public IP address. Save this for later.
https://www.whatsmyip.org/
Now, it’s time to get the server up and running. Visit Amazon Web Services (AWS) and setup a new account if you don’t already have one.
https://console.aws.amazon.com/console/home
In the “Build a solution” table, click “Launch a virtual machine,” select Debian 10 (free tier eligible), click “Launch and Review” and then “Launch.”


When you get to this step, edit storage. You are allowed up to 30GB in the free tier, so you may as well take all you can for free.

*** Set storage size to 30, otherwise you will not have enough drive space ***

This next step is very important. Administrative access to your server requires a secure key file that only you will possess. MAKE SURE YOU DOWNLOAD THE KEY! This will be your only opportunity to do-so. I keep my keys stored in a safe place, but also email them to myself as a way to keep another copy.

Double-check that you’ve downloaded it.

Continued on Part 2
Part 2
We will get back to the key in a minute, but first you will need to find out what your new server’s IP is.

Click your instance ID

and then check the public IP address

In order for you to connect to your server for administration, you will need to prepare your key for PuTTY. To do this, run puttygen.exe and click “Load”

The key you downloaded (in our example, it is ServUO.pem). In order for puttygen to see the file, you need to choose “All Files (*.*)”

You should receive a notice like this (click OK)

Now, save your private key (Password protecting your keys is an extra measure you can take in case your keys get into the wrong hands. We will not cover password protecting keys in this guide.)

Name and save the key somewhere safe where you can find it easily in the next step.

Continued on part 3
Part 3
Now, run PuTTY. Enter your server’s IP address from the AWS console and give it a name.

Now, find and click the category Connection/SSH/Auth

Browse to your key

and select your key

Now, go back to the Category Session

…and save your configuration

You should now see your AWS server in the list of saved sessions. Click Open

Continued on part 4
Part 4
If you did everything right so far, you will see a security alert from PuTTY.

Click “Yes” and then enter “admin” at the “login as:” prompt. No need for password, because you are using a key! (safe and easy!)

Your server is still fresh and needs some packages installed that will be needed to compile and run ServUO. You will need to use elevated access in order to install. Before we do that, we need to change the source list for packages, because the default source list doesn’t have everything we need.
Edit your source list:
Code:
sudo nano /etc/apt/sources.list
Now, press CTRL+K until all of the lines are gone and then paste in these lines (to paste into PuTTY, just right click)
Code:
deb http://deb.debian.org/debian/ buster main contrib non-free

deb-src http://deb.debian.org/debian/ buster main contrib non-free

deb http://security.debian.org/debian-security buster/updates main contrib non-free

deb-src http://security.debian.org/debian-security buster/updates main contrib non-free

deb https://packages.microsoft.com/debian/10/prod/ buster main contrib non-free
Press CTRL+X to exit and press Y (and enter) to save (don’t change the file name!)
Now, let’s do some updates
Enter command:
Code:
sudo apt-get updateAnd then enter command:
Code:
sudo apt-get upgrade
Press “Y” and enter to install available updates. This may take a few minutes. You will see lots of text scrolling as the updates are installed.
Install mono, some prerequisites, and helpful tools (htop and mlocate). First, enter command:
Code:
sudo apt-get install unzip htop mlocate ntp zlib1g-dev mono-completeAnswer “Y” enter as in the previous step.
This may also take a few minutes to install.
Now, you need to install dotnet-sdk-5.0. To get this, download from Microsoft and install:
Download:
Code:
wget https://packages.microsoft.com/config/debian/10/packages-microsoft-prod.deb -O packages-microsoft-prod.debinstall:
Code:
sudo dpkg -i packages-microsoft-prod.debdelete install file:
Code:
rm packages-microsoft-prod.debinstall apt-transport-https:
Code:
sudo apt-get install -y apt-transport-httpsUpdate source (don’t forget to run this before trying to install dotnet, or will not work):
Code:
sudo apt-get updateinstall DotNet 5.0:
Code:
sudo apt-get install dotnet-sdk-5.0The free AWS EC2 server only has 1GB of RAM, so you will receive a "memory exhausted" error if you try to compile and also risk running out of memory when your server is running. The fix for this is simple, create a swap file using available drive space.
A 4GB swap should do the trick (this will take a minute to complete):
Code:
sudo dd if=/dev/zero of=/swapfile bs=128M count=322. Update permissions for the new swap file:
Code:
sudo chmod 600 /swapfile3. Set up swap area:
Code:
sudo mkswap /swapfile[CODE]

4. Enable it:

[CODE]sudo swapon /swapfile
5. Confirm that it is working:
Code:
sudo swapon -s6. Ensure that it is enabled each time the server restarts by updating the /etc/fstab file.
Open the file in the editor:
Code:
sudo nano /etc/fstabAdd the following at the end of the file (last line), then save and exit:
Code:
/swapfile swap swap defaults 0 0Now, download the master branch of ServUO source code:
Code:
wget https://github.com/ServUO/ServUO/archive/refs/heads/master.zipUnzip it:
Code:
unzip master.zipChange to the new ServUO-master directyory:
Code:
cd ServUO-pub57Now compile the server:
Code:
dotnet build
After a minute or so, it will be ready! Now, all you need are some UO files and to update a few configuration files.
Continued in Part 5
Part 5
Open WinSCP and import your configuration from PuTTY

Click OK

Now, connect

…and login as admin (no password needed, remember you are using a key)

You will now see a graphical representation of your server.

Enter the ServUO-master directory by double-clicking on it, and then create a new directory by pressing F7 and name it “uo_files”


Now, copy the .MUL files from your UO client installation to uo_files directory on your server.

Once the MUL files have been copied over, you will need to update some of the configuration files. You can do this from WinSCP as well. Change directories to /home/admin/ServUO-master/Config
First, edit DataPath.cfg and add this line to the bottom:
Code:
CustomPath=/home/admin/ServUO-master/uo_files

…then save and close the file
Check documentation and forums on the ServUO website for more information on how to further customize your shard.
Now, from PuTTY, launch ServUO.exe for the first time:
Code:
mono ServUO.exeContinued on Part 6
Part 6

The first time you run, it will prompt you to setup your owner account. Use a name and password easy for you to remember, but others to figure out (and write it down or email to yourself). This tutorial does not get into further customization. Please refer to the forums, discord, and other great sources of ServUO information for more content on customization.
Your server will start, but you now will need to update your AWS firewall in order to allow outside clients to connect. Go back to the AWS website and click on “Security Groups”

Then Create Security Group (upper right of screen)

You will need to allow access to TCP port 2593 from Anywhere, but SSH TCP port 22 only from your own IP (My IP) If you do not have a fixed IP, or want to add other IPs, you can do so now or later if you IP changes. You should not allow access to port 22 from anywhere.

Now, go back to your dashboard and choose Change security groups for your server (aka instance).


Add the new group and delete the old one. The old security group allows access to the SSH port 22 from anywhere and is a security risk. Don’t skip this step!

Now, it’s time to connect using your game client. For this step, we will use the amazing ClassicUO client!
Get it here: ClassicUO

Continued on Part 7
Part 7


Enter the command [createworld to populate and decorate your new shard
Code:
[createworld
This concludes this tutorial. I hope you enjoyed setting up your shard on AWS. I've been an AWS users for many years have hosted (and still do) many web, PBX,and application servers. I've found the performance and stability to be outstanding and would recommend them to anyone.
There is still more to do on your new shard in addition to customizing it. I have some other tutorials on how to setup auto-restarts, using the screen application, and some other helpful Linux tips.
I did not have great success when trying to run ServUO on a free tier Windows server, but plan to try again sometime. If I have success with that, I'll be sure to drop a tutorial here for that as well.
Enjoy,
Ixtabay
Last edited:
