Backup from ArteGordon from http://xmlspawner.fr.yuku.com/topic/50/What-are-Attachments

What are attachments?


The attachment system allows dynamic functionality to be added to items/mobs without requiring any modification to the item/mob scripts themselves. Think of them as something like scripted "post-its" that can be stuck onto any item or mob, and can then give them new user-scriptable abilities. Multiple attachments can be added to targets.

All of the addon systems use this system and because of this, they require no modifications to any existing mobile, item, or playermobile scripts. Using this system, you never have to modify the Serialization of any object.

For example, placing the simple xmlhue attachment onto a mobile allows you to change its hue for some duration, after which it gets changed back to its original hue. In order to do this conventionally you would have to modify the playermobile script with additional variables, serialization/deserialization, timers, etc. If you also wanted to be able to do the same thing for creatures, you would have to add the same mods to basecreature, armor... basearmor, etc. With attachments, you can add the hue changing ability to any item or mob with no script modification of the target class. This includes things that are derived directly from inaccessible classes such as statics.

Commands:

- several commands are available for staff support of attachments.

[addatt attachmenttype [args] - allows attachments of the specified type to be added to targeted objects. For example, to have a door display a message whenever it is approached, you could do "[addatt xmlmessage Welcome!". To also have a sound played you could add "[addatt xmlsound 1048"

[getatt [type] - allows the attachments on a targeted object to be listed. If the optional type argument is given, then only attachments of that type are displayed.

[delatt [type][serial] - allows attachments on a targeted object to be deleted. If no arguments are given, then all attachments on the object are deleted. If the type is specified, then only attachments of that type are deleted. If a serial number is specified, then the specific attachment with that serial number is deleted (use [getatt to see the serial numbers).

[availatt - opens a gump that lists all of the available attachments and their various constructors and arguments. All constructors for objects derived from the XmlAttachment class and flagged with the [Attachable] attribute will be listed.

InGame Support:

- a checkbox in the [xmlfind gump allows searching for items/mobs with attachments. If the attach box is selected, then an additional filter for objects with attachments associated with them will be applied.

- using the ATTACH keyword in spawn entries allows attachments to be added to spawned items/mobs.
It is very similar to the ADD keyword, but instead of adding items, you add attachments.
The syntax is

ATTACH[,probability]/attachmenttype

If you further wish to set properties on the attachment that you are adding, you would use the syntax

ATTACH[,probability]/<attachmenttype/prop/value/prop/value...>

For example, the xmlmagicword attachment has a requireidentification property that can be set, that forces players to identify the attachment before it can be used. This property can be set at spawn time with

ATTACH/<xmlmagicword/requireidentification/true>

See attachtest2.xml for an example.

- the GET series of keywords (this includes GET, GETONMOB, GETONTRIGMOB, GETONCARRIED, GETONSPAWN) supports retrieving properties from attachments .
Whereever a property would normally be specified for those keywords, the new property keyword <ATTACHMENT,type,name,property> can be used. For example, to read the value property on an xmlvalue attachment with the name XS on a triggering mob you would specify

GETONTRIGMOB,<ATTACHMENT,xmlvalue,XS,value>

(See attachtest1.xml for examples).

- spawner triggering can be made dependent upon attachments on the triggering mob by using the "ATTACHMENT,name,type" string in the TriggerOnCarried or NoTriggerOnCarried properties.
This will make triggering dependent on attachments on the mob, or an attachment on an item equipped by the mob, or an attachment on an item in the top level of the mobs backpack (see attachtest1.xml for an example).

- attachments can also be used as quest rewards by specifying them in the RewardString of a questholder or questnote just as you would in the ATTACH keyword.
You should also enable autoreward to have them automatically applied on quest completion. They will be displayed as a "Bonus:" in the quest gump. The details of the attachment cannot be queried at the moment, but I will add that capability (See minionstrike.xml for an example)

- attachments are scripted and have class definitions that look similar to items or mobiles.
Users can script their own attachments in much the same way that they would script new items or mobs. All attachments are derived from the XmlAttachment class that implements the IXmlAttachment interface. This interface defines support for several features that all attachments have access to, including activation on movement, speech, and weapon hits (see XmlAttachment.cs for the interface specification). See the XmlAttachments folder for example scripts.

- attachments can also be used in other scripts by simply creating new instances of the attachments (e.g. XmlAttachment attachment = new XmlHue(200); ) and then applying them to the target with AttachTo(targetobject, attachment);
Note, that the attachment is achieved via an object/attachment hash table association, so there is no actual modification of the targetobject.

- all attachments are maintained in hashtables that are serialized separately from the item and mobile tables. The save information for attachments can be found in the Saves/Attachments folder.

- attachments support activation via speech or movement using the OnSpeech and OnMovement methods that can be defined in any attachment script.
This is accomplished by adding additional speech and movement event handlers. I have done extensive stress test profiling of these handlers up to loads equivalent to 10,000 simultaneous players and have calculated the additional overhead to be around a maximum of 1-3% additional cpu overhead for movement at 10K players, and less than 0.1% for speech, with a proportional decrease in load with fewer players. While it is highly unlikely that anyone would notice any impact of these handlers, they can be disabled if desired (of course, speech/movement attachment triggering will also be disabled) by simply commenting out the EventSink.Speech and EventSink.Movement handler lines in the Initialize method of XmlAttach in XmlAttach.cs.
 
Here is some info that will get you started in using the attachment system in your custom scripts.

first you will need to have the xmlspawner2 system installed.

The spawner itself isnt actually required for anything, but it includes the attachment system and is just easier to just load the whole thing for testing.

The idea of the system is that you create your new custom class derived from the XmlAttachment class that will hold all of your custom stuff that you would normally add directly into the item/mobile class that you were modding.
You can put data and methods in them just like you would a mobile or item class definition. The structure and method names are even the same. There are Deserialize and Serialize methods that you would use the same way that you would for items/mobiles. The difference is that the attachments are maintained separately from items/mobiles and can be assigned through hashtables to any arbitrary item/mobile, effectively adding new properties and methods without modifying the original item/mobile classes themselves.

The nice thing about it is that by putting your system data in attachments, you can upgrade versions by just modifying the attachment class without ever touching the item/mobile class or its ser/deser.

To create a custom attachment you can look at one of the attachment examples. I attached a script that defines an attachment called CustomData with a string property called Data.

You could add this attachment to any item/mobile.

add this using statement to the top of any script that refers to the attachment system
using
Code:
Server.Engines.XmlSpawner2;

and put something like this in its constructor.
Code:
// make the attachment
CustomData c = new CustomData();

// assign the properties
c.Data = "mydatastring";

// attach it to the object
XmlAttach.AttachTo(this, c);

or you could have also done it all in one line using the attachment constructor that took a string argument like this
Code:
XmlAttach.AttachTo(this, new CustomData("mydatastring"));

You could also add this on the fly while ingame by using the command

[addatt customdata mydatastring

Then any time that you wanted to get the data back from the object that it was attached to you would use code like this
Code:
CustomData c = (CustomData)XmlAttach.FindAttachment(from, typeof(CustomData));

string mydata = c.Data;

where 'from' would be a reference to whatever it was attached to. So where before you might have done 'from.Data' if you had actually added the property to the item/mobile class, now you first find the attachment on 'from', and access the Data property on the attachment instead.

You can also get access to the properties on the attachments by using the

[getatt

command. Then you can open up the properties on the attachment just like doing [props on a item/mobile.

Code:
using System;
using Server;

namespace Server.Engines.XmlSpawner2
{
    public class CustomData : XmlAttachment
    {
        private string m_DataValue = null;

        [CommandProperty( AccessLevel.GameMaster )]
        public string Data { get{ return m_DataValue; } set { m_DataValue = value; } }

        public CustomData(ASerial serial) : base(serial)
        {
        }

        [Attachable]
        public CustomData()
        {
        }

        [Attachable]
        public CustomData(string data)
        {
            Data = data;
        }

        public override void Serialize( GenericWriter writer )
        {
            base.Serialize(writer);

            writer.Write( (int) 0 );
            // version 0
            writer.Write((string)m_DataValue);

        }

        public override void Deserialize(GenericReader reader)
        {
            base.Deserialize(reader);

            int version = reader.ReadInt();
            // version 0
            m_DataValue = reader.ReadString();
        }
    }
}
 
Written by: Godfood 12/26/05

XMLSpawner Basic's: Part 1, The Main Spawner Gump
Skill Level: Beginner

First thing first, Download XMLSpawner2 and install it.

Next step is to start up your RunUO Server and log in.

My suggestion is to head over to Green Acres while learning how to use this spawner system. It makes it easier for clean up.
  • Type [set map Trammel, Then click on yourself once the target cursor comes up.
  • Then Type [go 5400 1200 0 and hit enter.
Once you've reached the spot you wish to use, add a spawner, type [add xmlspawner and click where you want to place the spawner. You should now see this
Crystal2.gif
on the ground where you clicked.

Next, Double click on the spawner. (The thing in the picture above). This will bring up the main Spawner gump.
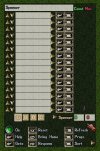
ai35.photobucket.com_albums_d174_XMLSpawnerFan_MainGump.jpg

Now we want to name our spawner. In the first textbox where it says spawner, delete the text and type in Walkthrough. then click the ai35.photobucket.com_albums_d174_XMLSpawnerFan_refresh.jpg buton to save the changes you made to the name.

Now that we have named our Spawner, let's move down just below where you typed in the name to the first entry box ai35.photobucket.com_albums_d174_XMLSpawnerFan_entrybox.jpg

This is where you add the things you want to spawn. We're going to spawn a rat. So, click in the text box and type in rat.
If you are unsure of the correct spelling for something, you can hit the
right22.gif
button to the right of the text box and it will open up a gump listing all of the possible valid spawn objects that contain the string "rat".
Next you want to hit the Up Arrow just to the left of the text box. This will increase the MAX field to 1. Meaning, The maximum number of this creature the spawner will have active at any given time is 1.

Your text box should now look like this ai35.photobucket.com_albums_d174_XMLSpawnerFan_rat2.jpg, and you should see a rat running around near the spawner.

We also want to spawn 3 cat's. So move to the text box just below our rat, and type in the word cat and hit the Up Arrow to the left of the text box 3 times. It should now say 3 in the MAX column, ai35.photobucket.com_albums_d174_XMLSpawnerFan_cat.jpg and we should have 1 rat, and 3 cats runing around near the spawner now.

Repeat the process for any additional creatures you want to spawn on this spawner.

Now we're going to move down just below the last text box to this ai35.photobucket.com_albums_d174_XMLSpawnerFan_pages.jpg. the numer's on the right represent the TOTAL number or creatures currently spawned, and the MAXIMUM numer of creatures the spawner will allow at any given time.

The number's on the left are the 4 page's of spawn entry's. That's right, there's 4 pages worth of entry boxes. That means you can have a total of 60 different creatures on one spawner. Just click on the number of the page you want to go to.

Now we're on to the last section of the gump. The controls.
ai35.photobucket.com_albums_d174_XMLSpawnerFan_controls.jpg

First thing is the round button in the top left, This button will turn the spawner ON and OFF. When turned ON the spawner will spawn creatures when needed, when turned OFF the spawner will not spawn creatures. Just to the right of the on button, is the RESET button. The reset button will do 2 things, First it will turn the spawner OFF, Secondly it removes any creatures it currently has spawned. A little more to the right and we find the REFRESH button which we used earlier. Anytime you change something in the textboxes, hitting this button will tell the spawner that there have been changes made.

Now, back to the left and below the on button, is the HELP button. I will cover this button and what it all means in another tutorial later. To the right of the help button is the Bring Home button. Clicking this button will bring any creatures the spawner is controlling to the same place the spawner is located. All the way to the right is the PROPS button. Again, I will cover this button in another tutorial.

In the bottom left hand corner is the GOTO button. Clicking this button will take you to the same spot as the spawner. In the middle on the bottom is the RESPAWN button. Click the respawn button will remove all creatues currently being controlled by the spawner, and start the spawning process over. The final button is the SORT button, This button to shall be covered in another tutorial.

I Have included the saved .XML Spawner file Just in case anyone want's it.

Once You've downloaded the file, Place it in your RunUO/Spawns folder. Then Type [xmlloadhere walkthrough1.xml in game to place the spawner.

You should now be able to do basic spawning with the XMLSpawner2 by: ArteGordon
 
Setting up a custom addon system with attachments

If you have thought about how you would set things up if you were to try to do it using an invisible item in the players pack to keep track of your system information, then doing it with attachments is very similar.

The difference would be, first of all, there would be no item for the server and client to keep track of so the lag associated with that is gone.
Second, the target doesnt actually have to have a pack to put the attachment in, so its use isnt restricted to npcs with packs.

The three things that you would have to do would be:

1) make the attachment that would hold all of your system information for a player.
Setting this up is almost identical to what you would do if you were to make an item, except that instead of deriving it from the Item class, you would derive it from the XmlAttachment class.
Then you would define your variables, serialization/deserialization, etc. just like you would on an item.
There are a few other minor differences (like defining the constructors as Attachable instead of Constructable, and specifying an ASerial argument instead of a Serial argument to the serial constructor) but you can look at any of the attachment examples and see what they should look like.

2) add the attachment to your target.
If this were an invisible item, you would then add the item to a players pack using something like

CODE

mob.AddToBackpack( new yournewitem());


The equivalent operation with attachments is to use the AttachTo call like this
CODE

XmlAttach.AttachTo(mob, new yournewattachment());


3) read/write the information on the attachment
If you were doing this with an item, when you wanted to get the information off of that item, you would first find the item in the players pack, and then access the properties on it using something like
CODE

YourNewItemType myitem = (YourNewItemType )mob.Backpack.FindItemByType( typeof(YourNewItemType ));

int val = myitem.Property1;


The equivalent operation with attachments is to use the
CODE

YourNewAttachmentType myattachment = (YourNewAttachmentType)XmlAttach.FindAttachment(mob, typeof(YourNewAttachmentType));

int val = myattachment.Property1;


You can also set properties on the attachment like
CODE

myattachment.Property1 = val;

After you had added the attachment, you could also access those properties ingame via the props gump as if it were an item, but instead of opening the players pack and doing a [props on the invisible item, you would use the [getatt command to open up the list of attachments on the player, and then press the props gump button to open up the props gump on it.
 
Howdy folks, here's my attempt at an intermediate tutorial. I've used HellRazors suggestions as a template for my quest design.

The Quest

The player walks past a beggar named Salim, who asks him for some gold for food. Upon giving the beggar some gold, he tells you that he knows of a treasure chest at the end of the tunnel up ahead, and offers you two paths. The fighter�s path, and the Thinker�s path. The fighter�s path requires you to kill 10 Brigands to get to the chest, and the thinker�s path gives you a code to break, which will allow you to navigate a teleporter maze. Once the player has completed one of these 2 tasks he/she then has access to the treasure chest and the quest is complete.

Writing up the Beggar NPC

The first thing I do is add a frozen xmlquestnpc, so that he doesn't wander around Green Acres while I'm trying to work on him.

[add xmlquestnpc set frozen true

And I bring up his blank dialog box with [xmledit

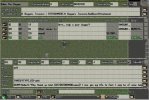
Now I add in the name of the questholder that I am handing out, and the attachment, as I don't want the NPC to respond to a player that already has the book, or has already completed the quest (As this example is a non-repeatable quest).

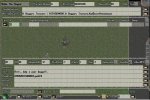
ai158.photobucket.com_albums_t109_Vladimir85_1.jpg

The "dependson" field for the first line has a -2 in it, because I want that line to take into account the TriggerOnCarried and NoTriggerOnCarried conditions. (a -1 will ignore those conditions.) I have added an additional condition in the "Condition" field, this checks to see that the player has at least 10 gold in his pack, as the quest requires you to give 10 gold to the Beggar. The "Text" field is what the NPC will say when a player (who is within the proximityrange) is found to have at least 10 gold on him/her.

ai158.photobucket.com_albums_t109_Vladimir85_2.jpg

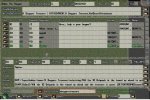
Now I add a new line by clicking the "Add" button at the bottom. This line handles what happens when the player responds to the beggars pleed, by saying "What seems to be the matter?" That is specified in the keywords field. You can also add multiple answers to the keywords field such as quest,yes,sure,hello,hail all seperated by commas. This allows the player to say any of those words or sentences to trigger this line. Another handy feature is the "talktext" property of the NPC itself, which allows you to type a word or sentence that the player will say, when he clicks the "Talk" button under the NPC's menu.
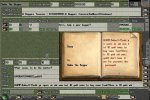
Once the player has said "What seems to be the matter?" This line triggers a GUMP that is brought up, and offers the player the choice of whether to give the Beggar some gold or not. The book allows you to add longer strings of text in the entry fields, and can be brought up by clicking the scroll-type button to the right of the entry line. This GUMP type (4) allows you to specify responses at the end of the text. The format is ;name of the button or response;response;name of next response;response2 etc� the second part of declaring the button (after the name of the button; ) is used as the keyword in the next line. As can be seen here�

ai158.photobucket.com_albums_t109_Vladimir85_3.jpg

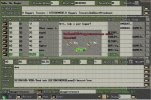
Nogold is the response if the player chooses not to give the Beggar some gold, in which case the Beggar replies: �Alright ya slob! Have it your way!� and the dialog is ended. Alternatively, the player could have chosen to be kind and give the Beggar 10 gold, which leads to the next line�

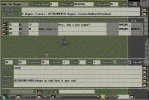
ai158.photobucket.com_albums_t109_Vladimir85_4.jpg

In this line, the NPC actively takes the gold, as can be seen in the action field: TAKEBYTYPE,1,10/gold (with format TAKEBYTYPE,probability,count/itemtype). This takes 10 gold from the players backpack in this case. Note that the dependson field (in this case it has the number 20) refers to the line number from which the response is coming. Apart from taking the gold, this line also displays a GUMP of type 4 to the player, with this text:

GUMP,Salim,4/Why thank ye kind {GETONTRIGMOB,name}! I owe you my life. In fact, I may be of some help to you. There lies a treasure chest most valuable in the cave up ahead, two paths lead to it, one fit for a fighter, the other for a witty mind. Which path do you wish to take?; I am a fighter at heart!;fighter;I seek a path of intellectual challenge!;maze;I am not ready for this challenge yet;no

The function of {GETONTRIGMOB,name} is to display the name of the player in the GUMP, to make it more personalised. So if the players name is Vladimir. He would then see his own name in place of the {GETONTRIGMOB,name} as seen here..

Why thank ye kind Vladimir!

This particular GUMP offers 3 choices. To take the path of a fighter, a thinker or to decline the task completely

If the player chooses the path of the fighter, the line looks like this�

ai158.photobucket.com_albums_t109_Vladimir85_5.jpg

Note that I saved my work at this stage (Should probably have been done earlier astatic.yuku.com_domain_bypass_images_tongue.gif). This line displays the GUMP describing what the player has to do, note that it is a type 0 GUMP, which means it only have 1 button at the end �Okay�, and the keyword is set to �done� when the player clicks this button.

This is also the line where the player is given the questholder (in the action field) and that line looks like this:

GIVE/<questholder/name/A Beggars Treasure/notestring/Kill the 10 Brigands in the tunnel up ahead to get to the treasure!/objective1/KILL,Brigand,10/objective2/Find the treasure/autoreward/true/repeatable/false

This gives a questholder with 2 objectives, Kill 10 Brigands and Find the treasure. If the player chooses to take the path of the thinker, the Line looks identical to that of the fighter, except that the player is given a different quest book:

GIVE/<questholder/name/A Beggars Treasure/notestring/Use the code book found inside the tunnel to navigate the maze and find the treasure/objective1/Complete the maze/objective2/Find the treasure/autoreward/true/repeatable/false

Once the player clicks the �Okay� button I added one more line�

ai158.photobucket.com_albums_t109_Vladimir85_6.jpg

This line dependson 60,70 as it could come as a response to either the fighter or thinker line, depending on which the player chooses. The keyword is �done� because I used the GUMP type 0 in the previous 2 lines.

SETONTHIS/MSG/Good luck {GETONTRIGMOB,name}!/doreset/true

This line in the action field tells the NPC to wish the player good luck, and it also resets the timer on the NPC (Resets the ResetTime at the top of the dialog gump). This is just so that the next player that comes along doesn�t have to wait 2 minutes before the NPC will respond to him. Also note that I saved my NPC again, and it is important that you overwrite the file when this GUMP comes up.

That�s the NPC done, now to do the spawners and the puzzles.

The Random Book Spawner

This is a spawner if that spawns a random book for the player doing the thinkers part of the quest. The book is a code that the player needs to break, and in my case the book was written and then added to the server as an item on its own. This is because I couldn�t find a way to spawn a book with writing in it. But the point of showing you this is to give you some insight into using the RND or random feature. To add a spawner, type [add xmlspawner and target the tile where you want to place the spawner. You can name the spawner by editing the field right at the top of the spawner gump on the left, or by adding it to the add string like this... [add xmlspawner set name "A Random Book Spawner" (the "" are important if the name of the spawner contains spaces).

ai158.photobucket.com_albums_t109_Vladimir85_7.jpg

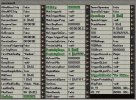
This is how I set up the properties of the random book spawner gump. MinDelay and MaxDelay are set to 0, so that the book spawns instantly. To trigger the spawner, you need to set a proximityrange (in this case it was 1, which means it will trigger as soon as a player comes within 1 tile away from the spawner). The �TriggerOnCarried� property should have the name of the questholder in it (ie it should have �A Beggars Treasure� in it for this quest, it is different in my example because the spawner I used this quest for had a different name�). Also, I put the names of the books it spawns (a possibility of 6) in the �NoTriggerOnCarried� property so that it doesn�t spawn another book, if the player already has on. The format is name of book 1,name of book 2,name of book 3 etc�

ai158.photobucket.com_albums_t109_Vladimir85_8_2.jpg

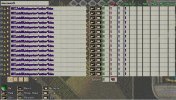
As you can see, the entries on the spawner gump are quite full, and carry on to the "second page". to view the second page of the spawner, click the "2" button or the number corresponding to the page number you want to view, as highlighted in the image above.

This is the part of the spawner that generates a random book and spawns it. The first 6 lines generate a random number between 1 and 6.

IF/RND,1,6=1/8/2

This means that: If a random number, between 1 and 6 is equal to 1, then go to subgroup 8 else go to subgroup 2
In other words, if the random number is 1, then go to group 8 and spawn that book (subgroups are the coloured numbers on the right in the �Sub� column).
If the random number is NOT 1, then it will go to subgroup 2, which will do the same test, but for number 2.
If the number IS 1, then it will skip the following lines until it gets to subgroup 8. At this stage, it will GIVE/epic2teleporterbook1, which is the name of the book I have saved. Also in group 8, it will show a message above the players head, telling him he has received a book. And lastly, the GOTO/1 tells the spawner to go back to subgroup 1, where it will stay until it is triggered by another player.

The Maze

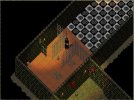
This is what the maze looks like to the player�

ai158.photobucket.com_albums_t109_Vladimir85_9.jpg

It consists of a grid of black and white tiles, that are numbered A1, A2, B1, B2 etc, much like a chess board.

ai158.photobucket.com_albums_t109_Vladimir85_10.jpg

In GM mode, you can see that on each tile, is a teleporter. The coordinates are set to somewhere outside the maze (preferably back to the beginning). The player must pass through the caged area to enter the maze, at that point I have placed 6 spawners on top of each other. There is 1 spawner for each of the books and what it does is turn off the teleporters along the path that that particular book has the answer to (All the teleporters are ON before the player walks past the initiating spawner). Here is what one of those spawners looks like�

ai158.photobucket.com_albums_t109_Vladimir85_11.jpg

The properties of the spawner are set to detect player in a proximityrange of 0 (or the same tile as the spawner). The spawner is also set to TriggerOnCarried �the name of that particular book� so that it only triggers the spawner, for the route that is described in the book. The spawnrange is irrelevant in this case� I only noticed I had changed it after I saved the image.

ai158.photobucket.com_albums_t109_Vladimir85_12.jpg

This shows how I turned off the teleporters along the path that the player must take (if he/she takes a wrong step he/she is teleported back to the beginning). If the lines are hard to read� here�s an example:
SET,TeleA1,teleporter/active/false
TeleA1 is the name of the teleporter on block A1 (the start of the route). All of these lines are under the same subgroup (this ensures that all of the lines are performed with 1 trigger, or at the same time). Once the player reaches the end of the maze there is a similar spawner that resets the maze. This is done using this line:

SETONNEARBY,20,teleporter/active/true (this sets all teleporters, in a range of 20 tiles to active)

This spawner also deletes the code book:

SETONCARRIED,The Teleporter Walkway/DELETE (DELETE must all be in caps)

Also having completed the maze, this should be reflected in the book, to do this you can add another line to the end spawner:

SETONCARRIED,A Beggars Treasure,questholder/completed1/true

The Brigands

Having chosen the fighters path, the player must defeat 10 brigands in order to find the treasure chests. Here is the props gump for the spawner.

ai158.photobucket.com_albums_t109_Vladimir85_13.jpg

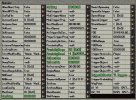
I set the proximityrange to 30, so that the brigands spawn before the player gets there. The key property here is the TriggerOnCarried property, it must be set to the name of the questholder �A Beggars Treasure� so that the brigands only spawn for a player doing the quest. RefractMax and RefractMin are set to 10 minutes; this means that the spawner will wait 10 minutes before respawning the brigands, because you don�t want them to keep respawning instantly.

The actual entry that spawns the brigands looks like this:

#CONDITION,GETONCARRIED,A Beggars Treasure,questholder,completed1=false ; Brigand

This spawns a brigand on the condition that the player hasn�t yet completed objective 1 on that quest, to spawn 10 brigands set the Max to 10 and the Per to 10 on the right hand side of the gump.

The Treasure Chest!

ai158.photobucket.com_albums_t109_Vladimir85_14.jpg

This is the props gump for the treasure chest spawner at the end of the quest, It has the same TriggerOnCarried as the previous spawner, but I have set the spawnrange to 0, so that the chest spawns on the same tile as the spawner. I have set a Duration of 20 minutes, this means that the chest will despawn after 20 mins so that (hopefully) other players won�t be able to loot from it. The entry for spawning the chest would look like this:

#CONDITION,GETONCARRIED,A Beggars Treasure,questholder,completed2=false ; TreasureChestLevel5

This would spawn a level 5 treasure chest, as long as the player hasn�t completed the second objective (Find the treasure). This stops the player spawning the chest repeatedly and getting infinite rewards, because in the next step we set that objective to complete:

On the next line in the spawner we have this:

SETONCARRIED,A Beggars Treasure,questholder/completed/2true

This completes the second objective, and the questholder should now dissapear (at it was set to autoreward/true and the player should get 1 quest point for completing the quest)

Both the of these lines should be placed under the SAME subgroup, so that they are both activated by the first trigger

And with that, your done!

ai158.photobucket.com_albums_t109_Vladimir85_15.jpg

Thanks to Justae for idea and implementation of the teleporter maze puzzle (which we actively use as a quest on our shard). I hope this post comes in handy, any corrections/suggestions/additions are MORE than welcome!

Regards, Vlad
 
We have to wonder how many of these commands have changed over the years/updated or not :)
 
I remember reading through all this years ago and feeling like my mind was just blown! There was SO much to absorb and understand, but thankfully, I have never screwed up something using Xmlspawner so badly that it killed my shard :)
 
Back